Stream data ingestion with Redpanda
Stream data ingestion with Redpanda
Redpanda
장점
- 관리가 쉬울 뿐만 아니라 플랫폼 구축 비용도 저렴하기 때문에 시스템 관리자의 작업도 덜 어렵다.
- Redpanda를 10배 더 빠르고 6배 더 저렴하게 만드는 두 가지 주요 기능은 Zookeeper를 제거하고 C++로 코딩된 Raft 알고리즘을 사용하여 JVM을 건드릴 필 요가 없다.
- Redpanda는 200시간의 테스트 실행을 통해 실험적으로 테스트되었다.
- Redpanda는 Kafka connect와 같은 Kafka 생태계와 완벽하게 호환된다.
데이터 수집에 사용할 브로커로 Redpanda를 설치하는 과정을 진행하겠습니다.
여기 GitHub 링크를 사용하여 재현할 수 있다:
- https://github.com/ongxuanhong/de01-stream-ingestion-redpanda-minio
- 데이터 소스는
- 비즈니스의 운영 데이터, 특히 사용자의 주문 트랜잭션을 에뮬레이트하는 MySQL이 다.
- 또한 이커머스 웹사이트에서 사용자 상호 작용 프로세스를 시뮬레이션하는 클릭스 트림 이벤트가 있을 것이다.
- 대상 싱크 분산 스토리지로 S3, GCS 또는 Azure Blob을 사용할 수 있습니다.
- 하지만 대부분의 독자가 클라우드 제공업체에 계정을 만들지 않고도 쉽게 설치할 수 있기를 원했기 때문에 대신 MinIO를 사용하기로 결정했다.
- 소스/싱크 데이터를 전송하기 위해 MySQL용 debezium과 MinIO용 Kafka connect 를 설치했다.
Data sources
MySQL - operational data
- We use docker-compose.yml to bulid MySQL service
1
2
3
4
5
6
7
8
9
mysql:
    image: debezium/example-mysql:1.6
    container_name: mysql
    volumes:
      - ./mysql/data:/var/lib/mysql
    ports:
      - "3306:3306"
    env_file:
      - .env
.env파일
1
2
3
MYSQL_ROOT_PASSWORD="debezium"
MYSQL_USER="admin"
MYSQL_PASSWORD="admin123"
여기서는 debezium이 데이터에 동기적으로 액세스할 수 있도록 이미 CDC 설정이 있는 debezium/example-mysql:1.6이라는 이름의 도커 이미지를 사용한다.
많은 명령을 입력하는 데 시간을 낭비하고 싶지 않기 때문에 시스템과 상호 작용할 수 있는 명령의 바로 가기가 포함된 Makefile 파일을 사용했습니다.
Makefile
1
2
3
4
5
6
7
8
9
10
11
12
13
14
15
16
17
18
19
20
21
22
23
24
25
include .env

build:
  docker-compose build

up:
  docker-compose --env-file .env up -d

down:
  docker-compose --env-file .env down

ps:
  docker ps --format "table \t\t"

to_redpanda:
  open http://localhost:8080/topics

to_minio:
  open http://localhost:9001/buckets

to_mysql:
  docker exec -it mysql mysql -u"root" -p"${MYSQL_ROOT_PASSWORD}" ${MYSQL_DATABASE}

to_data_generator:
  docker exec -it data_generator /bin/bash
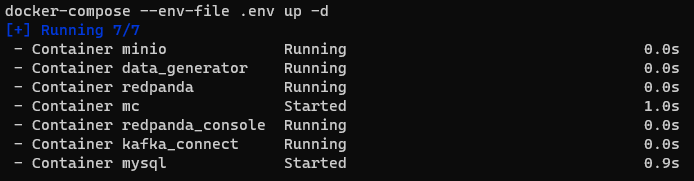
Spawn data infrastructure
1
2
3
4
5
6
7
make up

# checking redpanda console
make to_redpanda

# checking minio
make to_minio
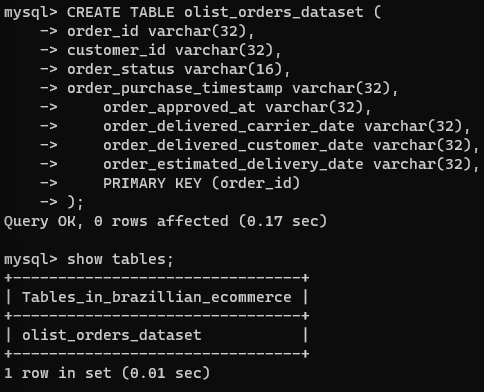
Prepare MySQL data source
주문 거래 데이터를 저장하기 위해 olist_orders_dataset 테이블을 사용하여 브라질_전자상거래 데이터베이스를 생성한다.
- 모든 데이터는 Kaggle로 이동하여 등록하고 다운로드할 수 있다.
- 편의를 위해 Github 에서 사용할 수 있도록 만들었다.
- 다음으로
make up명령어를 실행하여 MySQL 서비스를 빌드하고maketo_mysql명령어를 실행하여 MySQL에 접속한 후 아래와 같이 명령어를 실행 한다.

데이서 생성 Scripts
- 다음으로 트랜잭션 데이터를 생성하는 스크립트가 포함된 src/를
- 다음과 같은 파일/폴더 구조로 생성한다.
1
2
3
4
5
6
7
8
src
├── 01_generate_orders.py
├── 02_generate_clickstream.py
├── data
│   └── olist_orders_dataset.csv
├── Dockerfile
├── requirements.txt
└── setup_connectors.sh
- 01_generate_orders.py : used to generate transaction data for MySQL.
- 02_generate_clickstream.py : used to generate clickstream events data.
- data/olist_orders_dataset.csv: contains transaction data.
- Dockerfile : used to package all the src/ code and necessary requirements.
- requirements.txt : contains a list of installed libraries.
- setup_connectors.sh : contains requests used to create source/sink connections for Kafka connect.
src/용 도커 이미지를 빌드하려면 docker-compose.yml에 다음 선언을 추가한다.
1
2
3
4
5
6
7
8
9
data-generator:
    build:
      context: ./src
      dockerfile: ./Dockerfile
    container_name: data_generator
    volumes:
      - ./src:/opt/src
    env_file:
      - .env
그런 다음 make를 사용하여 MySQL용 트랜잭션 데이터를 생성한
다.
1
2
3
4
make build
make down
make up
make to_data_generator
to_data_generator 컨테이너에 들어갈 때 파이썬을 사용하여
- 01_generate_orders.py 스크립트를 실행한다. 성공하면 아래와 유사한 출력이 표시된다.
Generation scripts
1
2
3
4
python -m venv venv
source venv/bin/activate
pip install -r requirements.txt
python src/01_generate_orders.py
💡 ERROR:

패키지가 시스템 전체 Python에 이미 설치되어 있으면 가상 환경에 다시 설치되지 않고 요구 사항이 이미 충족되었음을 알리는 메시지가 표시됩니다.
이를 해결하기 위해
pip install명령을 실행할 때--ignore-installed플래그를 사용하였습니다. 이 플래그는 시스템 전체 Python에 이미 패키지가 설치되어 있어도 pip가 패키지를 다시 설치하도록 강제합니다.

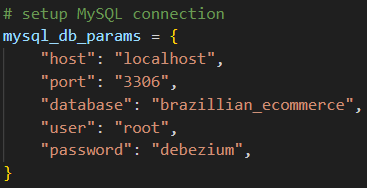
01_generated_orders.py파일의 MySQL HOST 정보를 수정한다.
1
2
3
4
5
6
7
8
(74254, 9)
NO. DATES: 366
Writing data on: 2017-08-01
-Records: 165
Writing data on: 2017-08-02
-Records: 157
Writing data on: 2017-08-03
-Records: 148
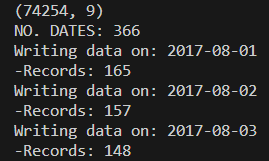
We return to MySQL to check the generated data

Ingestion layer : Redpanda
Redpanda — fast storage for real-time data streaming
- CDC 데이터를 확보한 후, 스트리밍 이벤트를 읽기 위해 Redpanda를 계속 설치한다. 다음과 같은 선언을 계속 추가합니다.
1
2
3
4
5
6
7
8
9
10
11
12
13
14
15
16
17
18
19
20
21
22
23
24
25
26
27
28
29
30
31
32
33
redpanda:
    image: vectorized/redpanda
    container_name: redpanda
    ports:
      - "9092:9092"
      - "29092:29092"
    command:
      - redpanda
      - start
      - --overprovisioned
      - --smp
      - "1"
      - --memory
      - "1G"
      - --reserve-memory
      - "0M"
      - --node-id
      - "0"
      - --kafka-addr
      - PLAINTEXT://0.0.0.0:29092,OUTSIDE://0.0.0.0:9092
      - --advertise-kafka-addr
      - PLAINTEXT://redpanda:29092,OUTSIDE://redpanda:9092
      - --check=false

  redpanda-console:
    image: vectorized/console
    container_name: redpanda_console
    depends_on:
      - redpanda
    ports:
      - "8080:8080"
    env_file:
      - .env
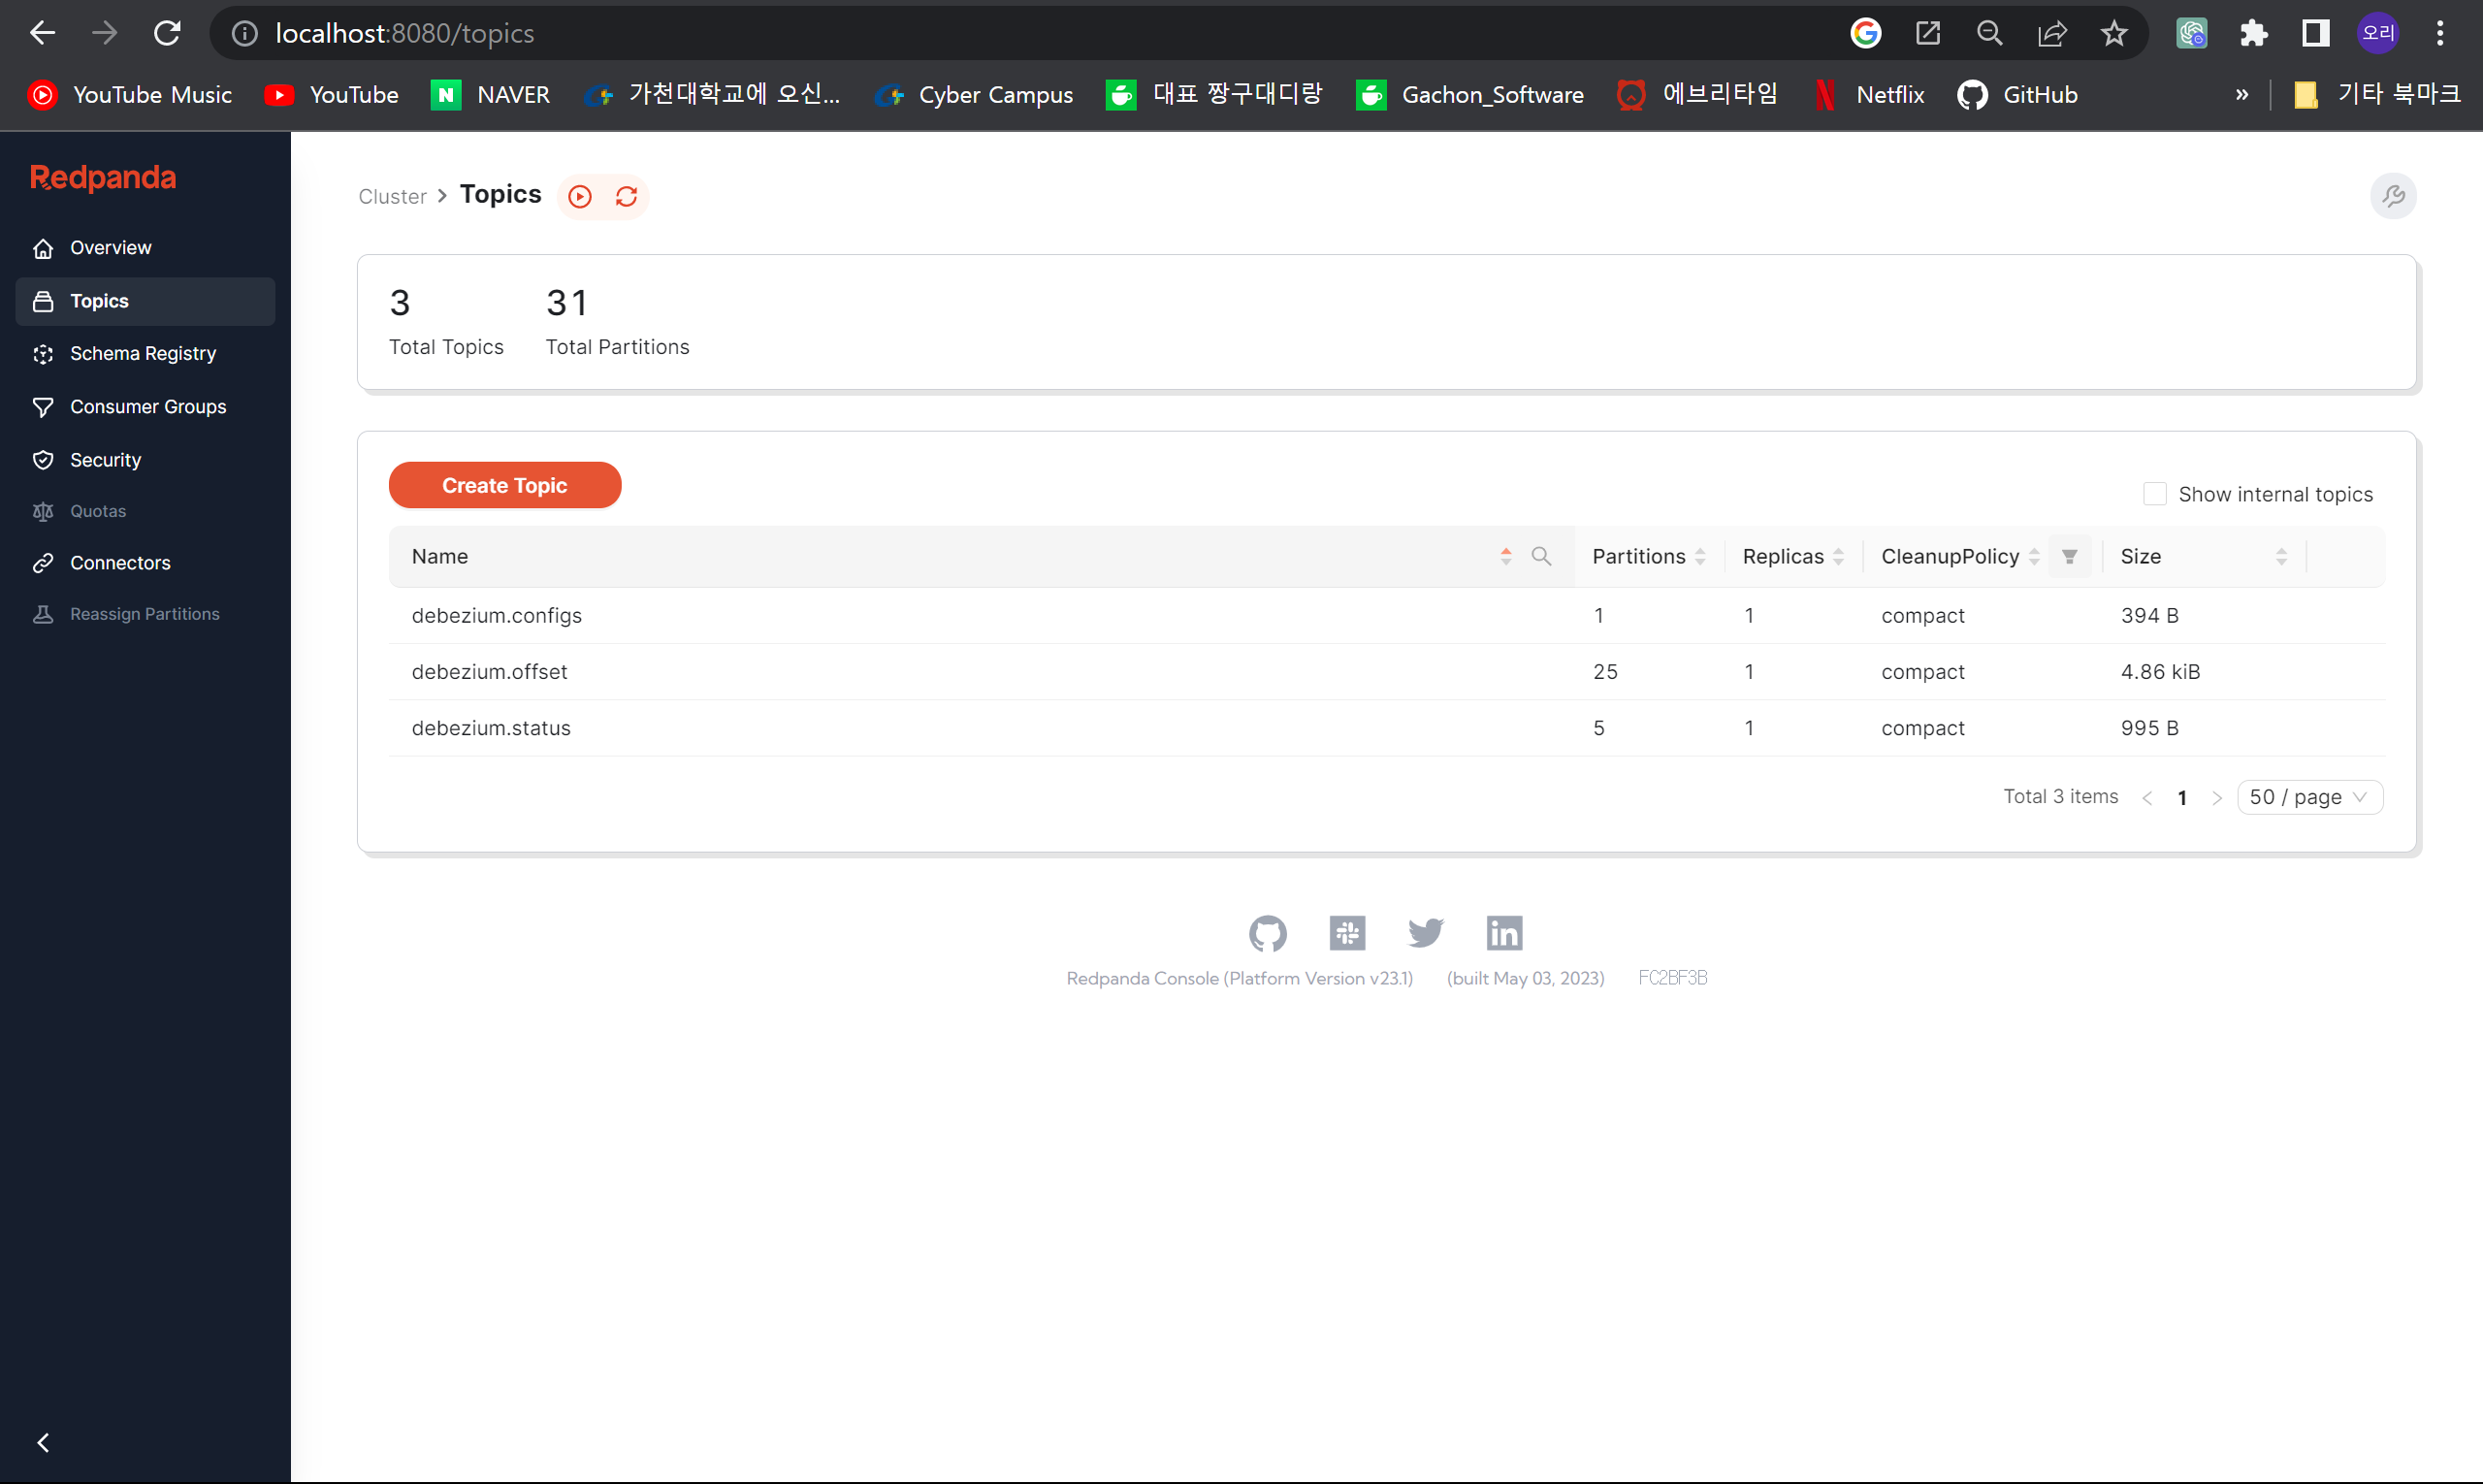
- make down && make up으로 서비스를 다시 시작한다. 성공하면 http://localhost:8080/topics 에 접속하면 아래와 같은 redpanda console 인터페이스가 표시됩니다.
Ingestion layer : Kafka connect
Kafka connect — transfer data from source to sink
- 스트리밍 이벤트를 포함하기 위해 Redpanda에 토픽을 생성하고, 이 토픽에서 데이터를 읽는 스크립트를 작성하고, MinIO에 저장하는 등의 프로세스를 처음부터 완전히 자체 코딩할 수 있다.
- 소스에서 싱크까지 연결을 지원하는 수많은 커넥터와 Kafka를 연결하여 작업 설정과 실행에만 집중함으로써 복잡한 설치 시간을 절약할 수 있다.
- Kafka 연결의 기본 Docker 이미지는
io.confluent.connect.s3.S3SinkConnector가 없으므로, Kafka 연결용 커넥터를 다운로드하려면 Dockerfile로 kafka/ 폴더를 만들어야 한다.
1
2
3
4
5
6
FROM debezium/connect

RUN curl -O https://d1i4a15mxbxib1.cloudfront.net/api/plugins/confluentinc/kafka-connects3/versions/10.3.1/confluentinc-kafka-connect-s3-10.3.1.zip \
	&& unzip confluentinc-kafka-connect-s3-10.3.1.zip \
	&& mv confluentinc-kafka-connect-s3-10.3.1 /kafka/connect/ \
	&& rm confluentinc-kafka-connect-s3-10.3.1.zip
We add docker-compose.yml with declarations like below
1
2
3
4
5
6
7
8
9
10
11
kafka-connect:
    build:
      context: ./kafka
      dockerfile: ./Dockerfile
    container_name: kafka_connect
    depends_on:
      - redpanda
    ports:
      - "8083:8083"
    env_file:
      - .env
- After make build && make down && make up we test the Kafka connect service by requesting to localhost:8083/connector-plugins/
1
2
3
4
5
6
7
8
9
10
11
12
13
{'class': 'io.confluent.connect.s3.S3SinkConnector', 'type': 'sink', 'version': '10.3.1'},
{'class': 'io.confluent.connect.storage.tools.SchemaSourceConnector', 'type': 'source', 'version': '3.4.0'},
{'class': 'io.debezium.connector.db2.Db2Connector', 'type': 'source', 'version': '2.2.0.Alpha3'},
{'class': 'io.debezium.connector.mongodb.MongoDbConnector', 'type': 'source', 'version': '2.2.0.Alpha3'},
{'class': 'io.debezium.connector.mysql.MySqlConnector', 'type': 'source', 'version': '2.2.0.Alpha3'},
{'class': 'io.debezium.connector.oracle.OracleConnector', 'type': 'source', 'version': '2.2.0.Alpha3'},
{'class': 'io.debezium.connector.postgresql.PostgresConnector', 'type': 'source', 'version': '2.2.0.Alpha3'},
{'class': 'io.debezium.connector.spanner.SpannerConnector', 'type': 'source', 'version': '2.2.0.Alpha3'},
{'class': 'io.debezium.connector.sqlserver.SqlServerConnector', 'type': 'source', 'version': '2.2.0.Alpha3'},
{'class': 'io.debezium.connector.vitess.VitessConnector', 'type': 'source', 'version': '2.2.0.Alpha3'},
{'class': 'org.apache.kafka.connect.mirror.MirrorCheckpointConnector', 'type': 'source', 'version': '3.4.0'},
{'class': 'org.apache.kafka.connect.mirror.MirrorHeartbeatConnector', 'type': 'source', 'version': '3.4.0'},
{'class': 'org.apache.kafka.connect.mirror.MirrorSourceConnector', 'type': 'source', 'version': '3.4.0'}
Ingestion layer : Debezium
Debezium — read Change Data Capture from MySQL
- 데이터를 읽어오려면 Kafka 연결용 커넥터를 생성하기만 하면 된다. 커넥터의 이름은
io.debezium.connector.mysql.MySqlConnector입니다. - kafka _connect 컨터이너에 접속하여 커넥터를 생성한다.
1
2
3
4
5
6
7
8
9
10
11
12
13
14
15
16
17
18
19
curl --request POST \
--url http://localhost:8083/connectors \
--header 'Content-Type: application/json' \
--data '{
"name": "src-brazillian-ecommerce",
"config": {
"connector.class": "io.debezium.connector.mysql.MySqlConnector",
"tasks.max": "1",
"database.hostname": "mysql",
"database.port": "3306",
"database.user": "debezium",
"database.password": "dbz",
"database.server.id": "184054",
"database.include.list": "brazillian_ecommerce",
"topic.prefix": "dbserver1",
"schema.history.internal.kafka.bootstrap.servers": "redpanda:9092",
"schema.history.internal.kafka.topic": "schema-changes.brazillian_ecommerce"
}
}'
요청이 성공하면 Redpanda 콘솔로 돌아가면 디비지움 관련 토픽 이 자동으로 생성된 것을 확인할 수 있다.
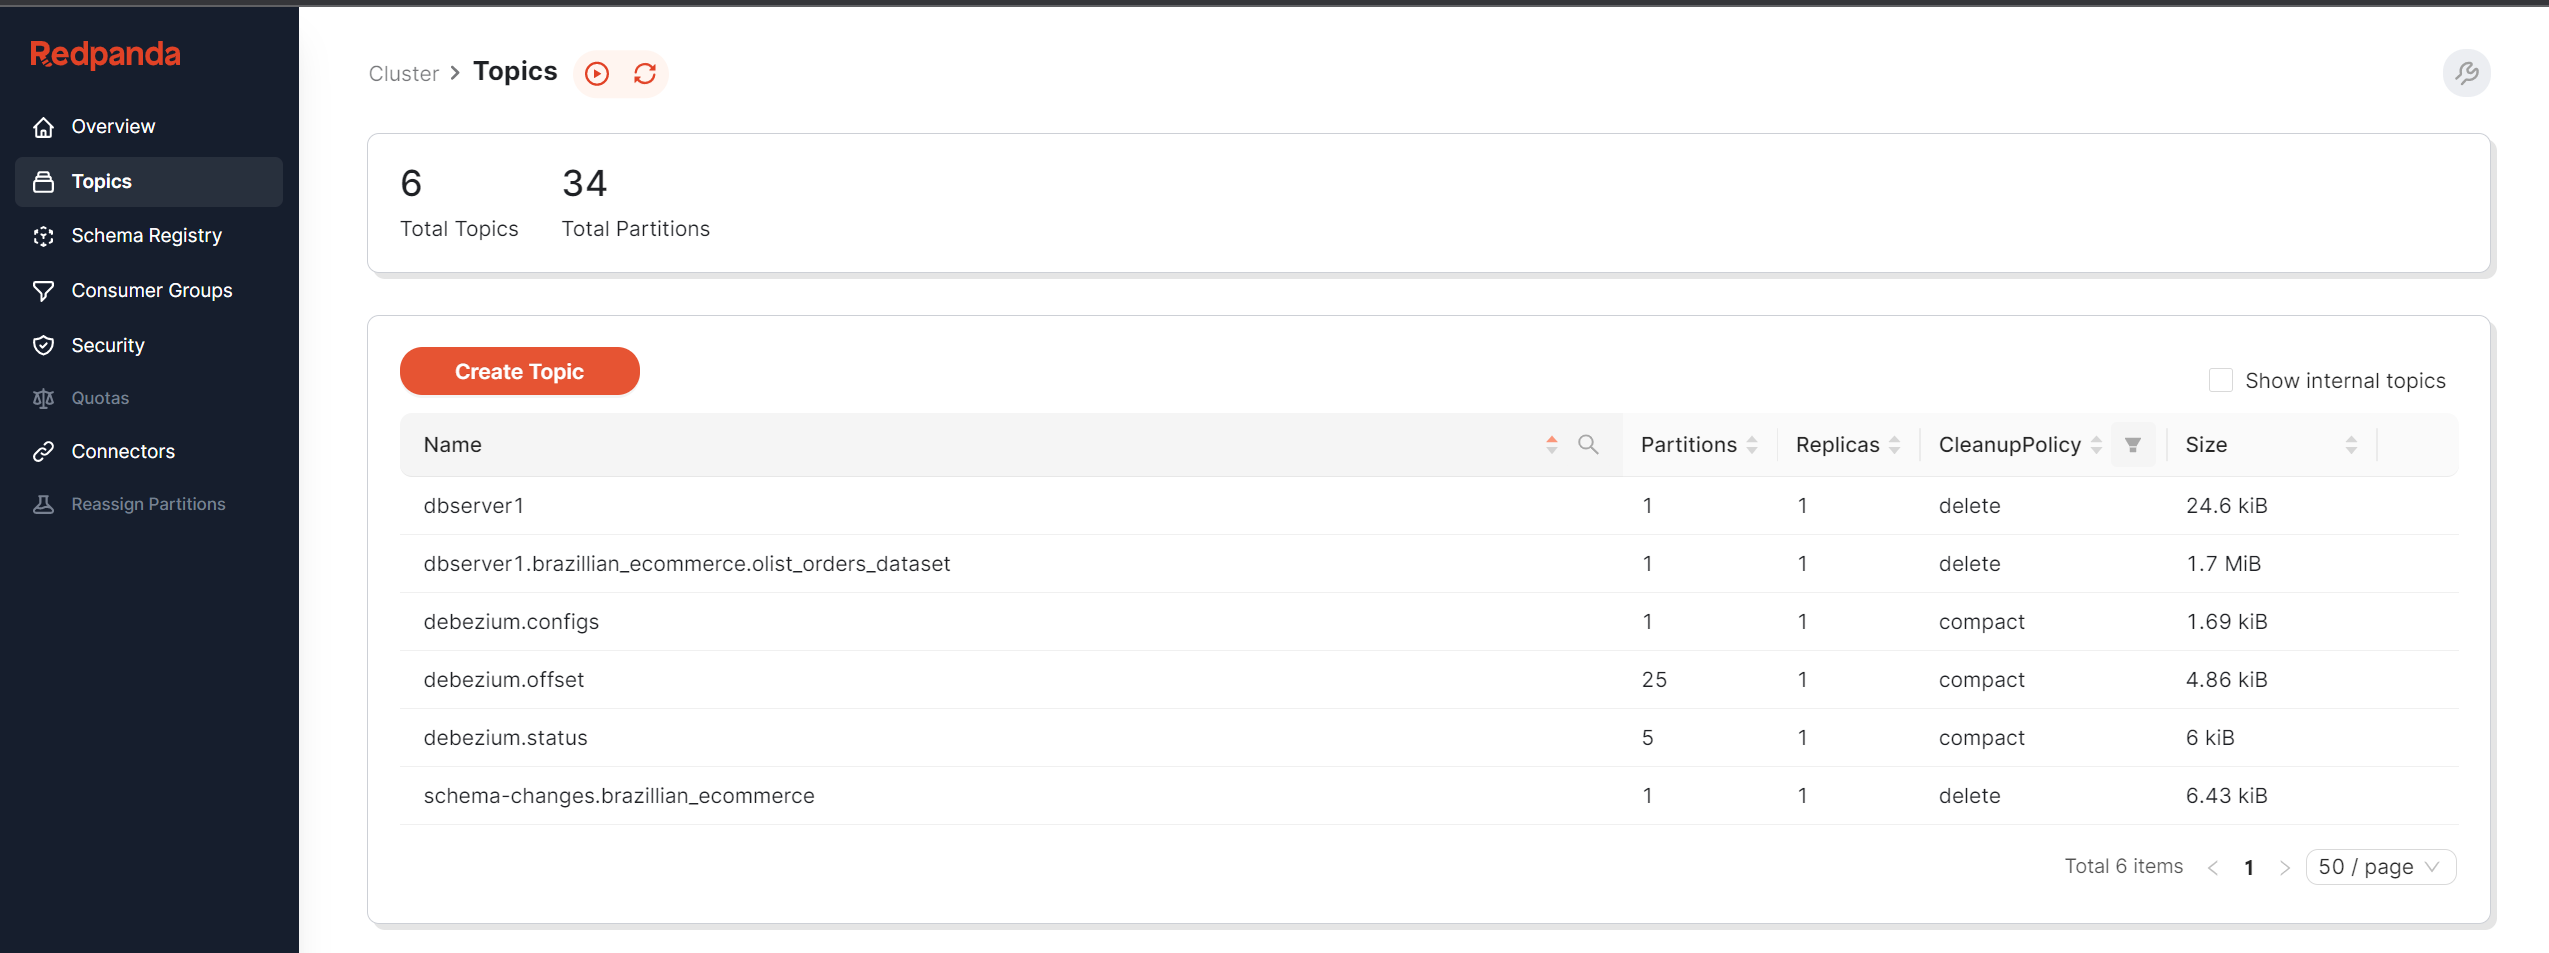
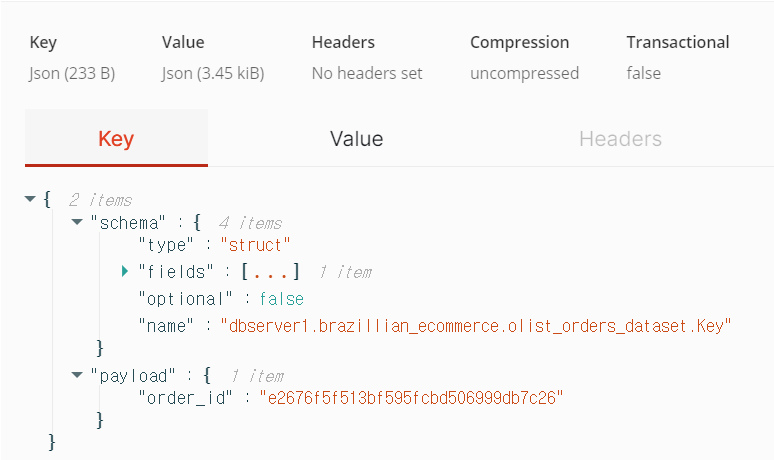
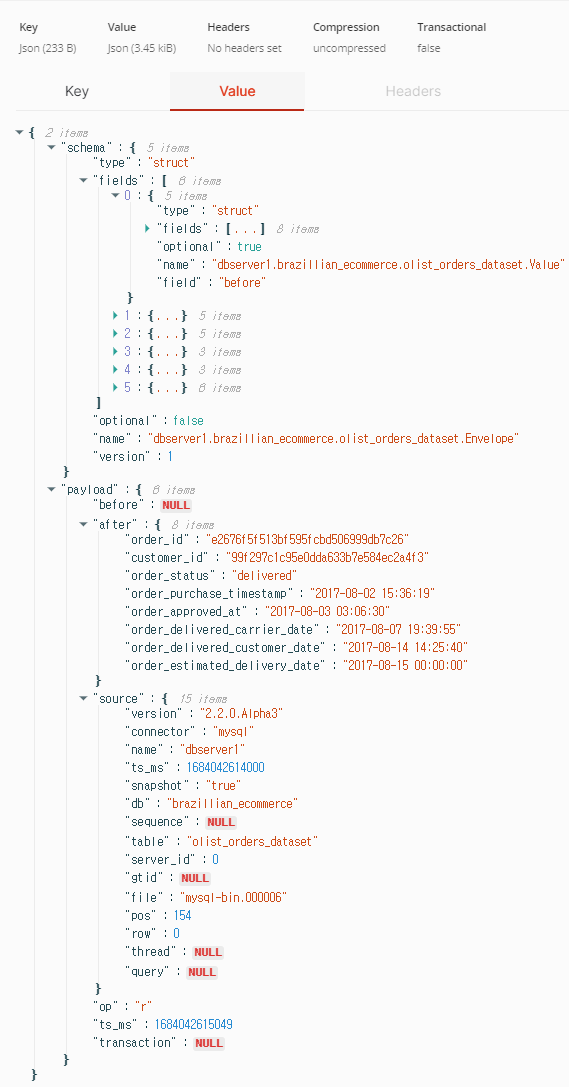
dbserver1.brazilian_ecommerce.olist_orders_dataset 항목을 확인하면 CDC 메시지의 전체 내용을 볼 수 있다.
- 수집된 콘텐츠를 기반으로 데이터베이스 PostgreSQL, 데이터 웨어하우스 Redshift 또는 데이터 레이크하우스와 같은 다양한 대상 싱크에 복제할 수 있다.
Target sink: MinIO
MinIO - data lake for distributed data storage
- Finally, the destination of the data will be MinIO. We add the declarations for MinIO as below to docker-compose.yml
1
2
3
4
5
6
7
8
9
10
11
12
13
14
15
16
17
18
19
20
21
22
23
24
25
minio:
    hostname: minio
    image: "minio/minio"
    container_name: minio
    ports:
      - "9001:9001"
      - "9000:9000"
    command: [ "server", "/data", "--console-address", ":9001" ]
    volumes:
      - ./minio/data:/data
    env_file:
      - .env

  mc:
    image: minio/mc
    container_name: mc
    hostname: mc
    environment:
      - AWS_ACCESS_KEY_ID=minio
      - AWS_SECRET_ACCESS_KEY=minio123
      - AWS_REGION=us-east-1
    entrypoint: >
      /bin/sh -c " until (/usr/bin/mc config host add minio http://minio:9000 minio minio123) do echo '...waiting...' && sleep 1; done; /usr/bin/mc mb minio/warehouse; /usr/bin/mc policy set public minio/warehouse; exit 0; "
    depends_on:
      - minio
- along with the environment variables added to the
.envfile
1
2
3
4
5
# MinIO
MINIO_ROOT_USER="minio"
MINIO_ROOT_PASSWORD="minio123"
MINIO_ACCESS_KEY="minio"
MINIO_SECRET_KEY="minio123"
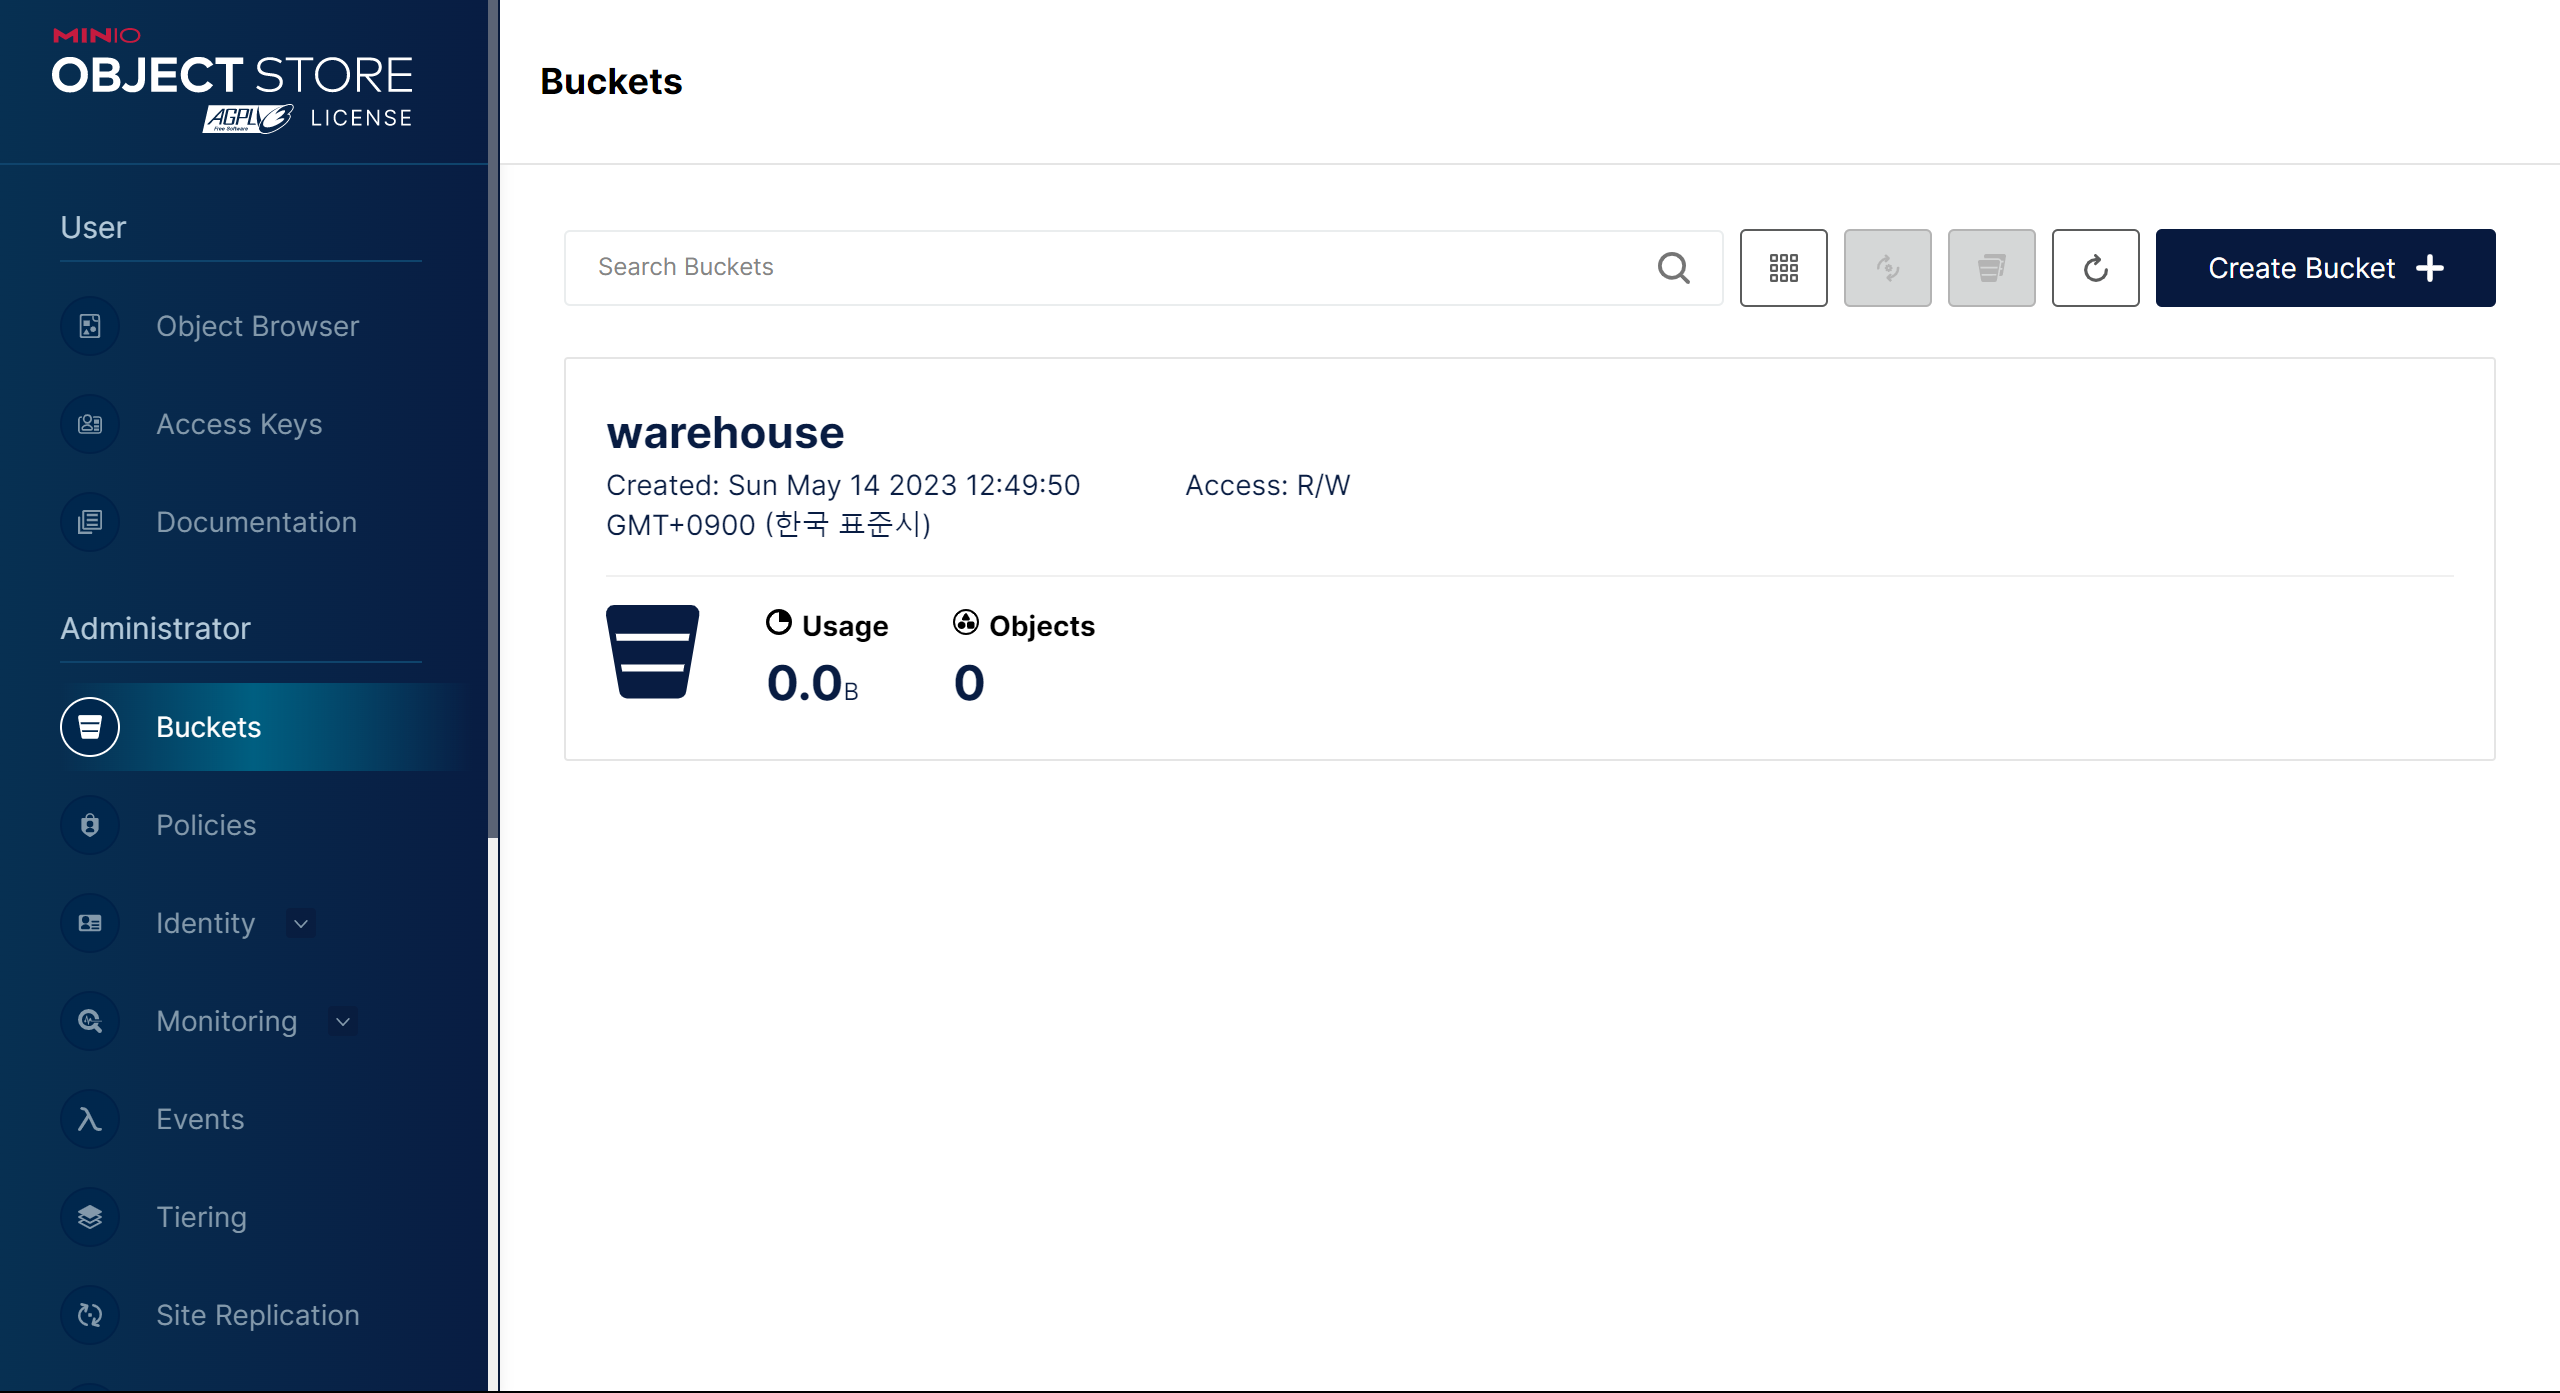
- After make down && make up. We access http://localhost:9001/buckets and we will see the interface presented as shown below
Target sink : Sink CDC
Sink CDC data into MinIO
- We use Kafka connect to sync data directly to MinIO. Detailed setup information of
io.confluent.connect.s3.S3SinkConnector, you can find here . - https://docs.confluent.io/kafka-connectors/s3-sink/current/configuration_options.htm
- kafka_connect 컨테이너에 접속하여 커넥터를 생성한다.
1
2
3
4
5
6
7
8
9
10
11
12
13
14
15
16
17
18
19
20
21
curl --request POST \
--url http://localhost:8083/connectors \
--header 'Content-Type: application/json' \
--data '{
"name": "sink-s3-brazillian-ecommerce",
"config": {
"topics.regex": "dbserver1.brazillian_ecommerce.*",
"topics.dir": "brazillian_ecommerce",
"connector.class": "io.confluent.connect.s3.S3SinkConnector",
"key.converter": "org.apache.kafka.connect.json.JsonConverter",
"value.converter": "org.apache.kafka.connect.json.JsonConverter",
"format.class": "io.confluent.connect.s3.format.json.JsonFormat",
"flush.size": "1000",
"store.url": "http://minio:9000",
"storage.class": "io.confluent.connect.s3.storage.S3Storage",
"s3.region": "us-east-1",
"s3.bucket.name": "warehouse",
"aws.access.key.id": "minio",
"aws.secret.access.key": "minio123"
}
}'

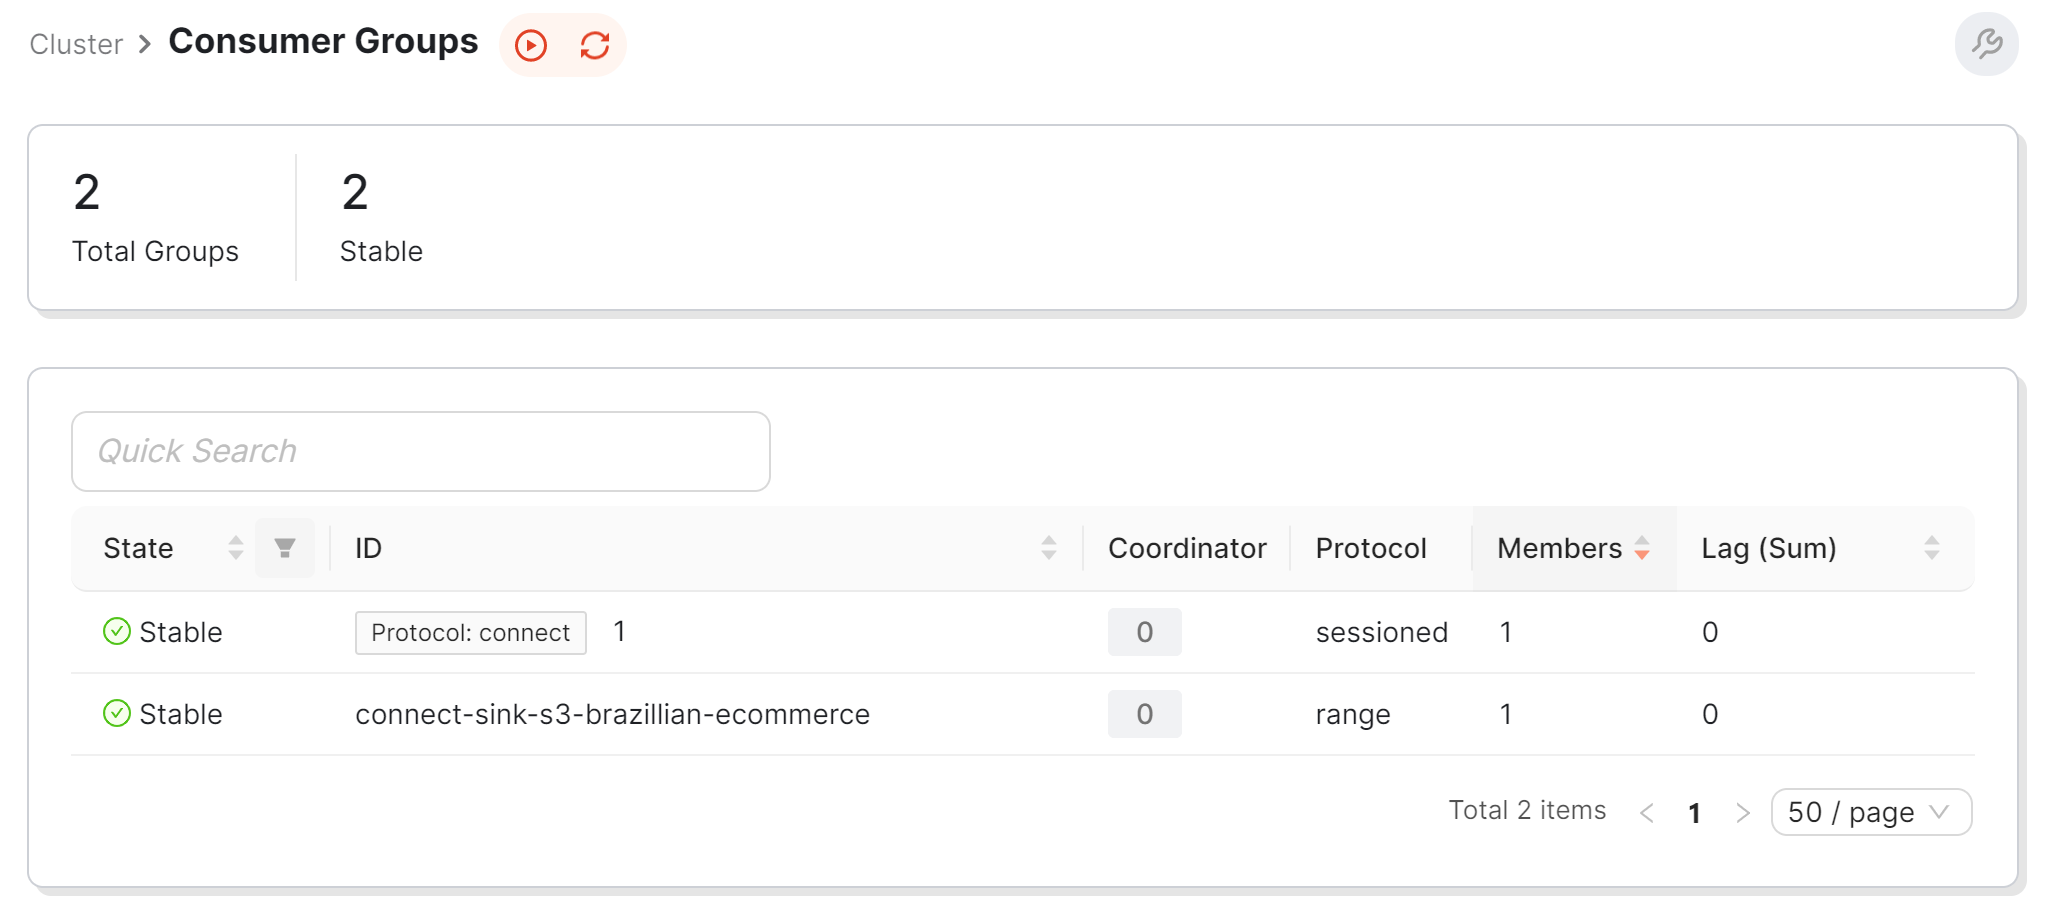
- Check the information on the Redpanda console, we will see a new consumer group is created
- When the data synchronization is complete, we will see the synced files in MinIO
Same for clickstream data
Clickstream — user event data
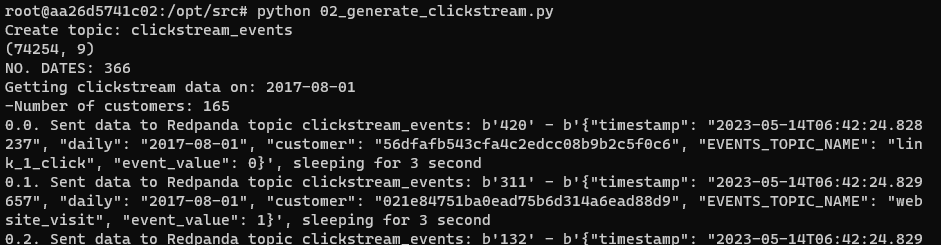
We do the same by accessing the data_generator container via make to_data_generator. Then use python to run the script 02_generate_clickstream.py when successful we will see the log as below

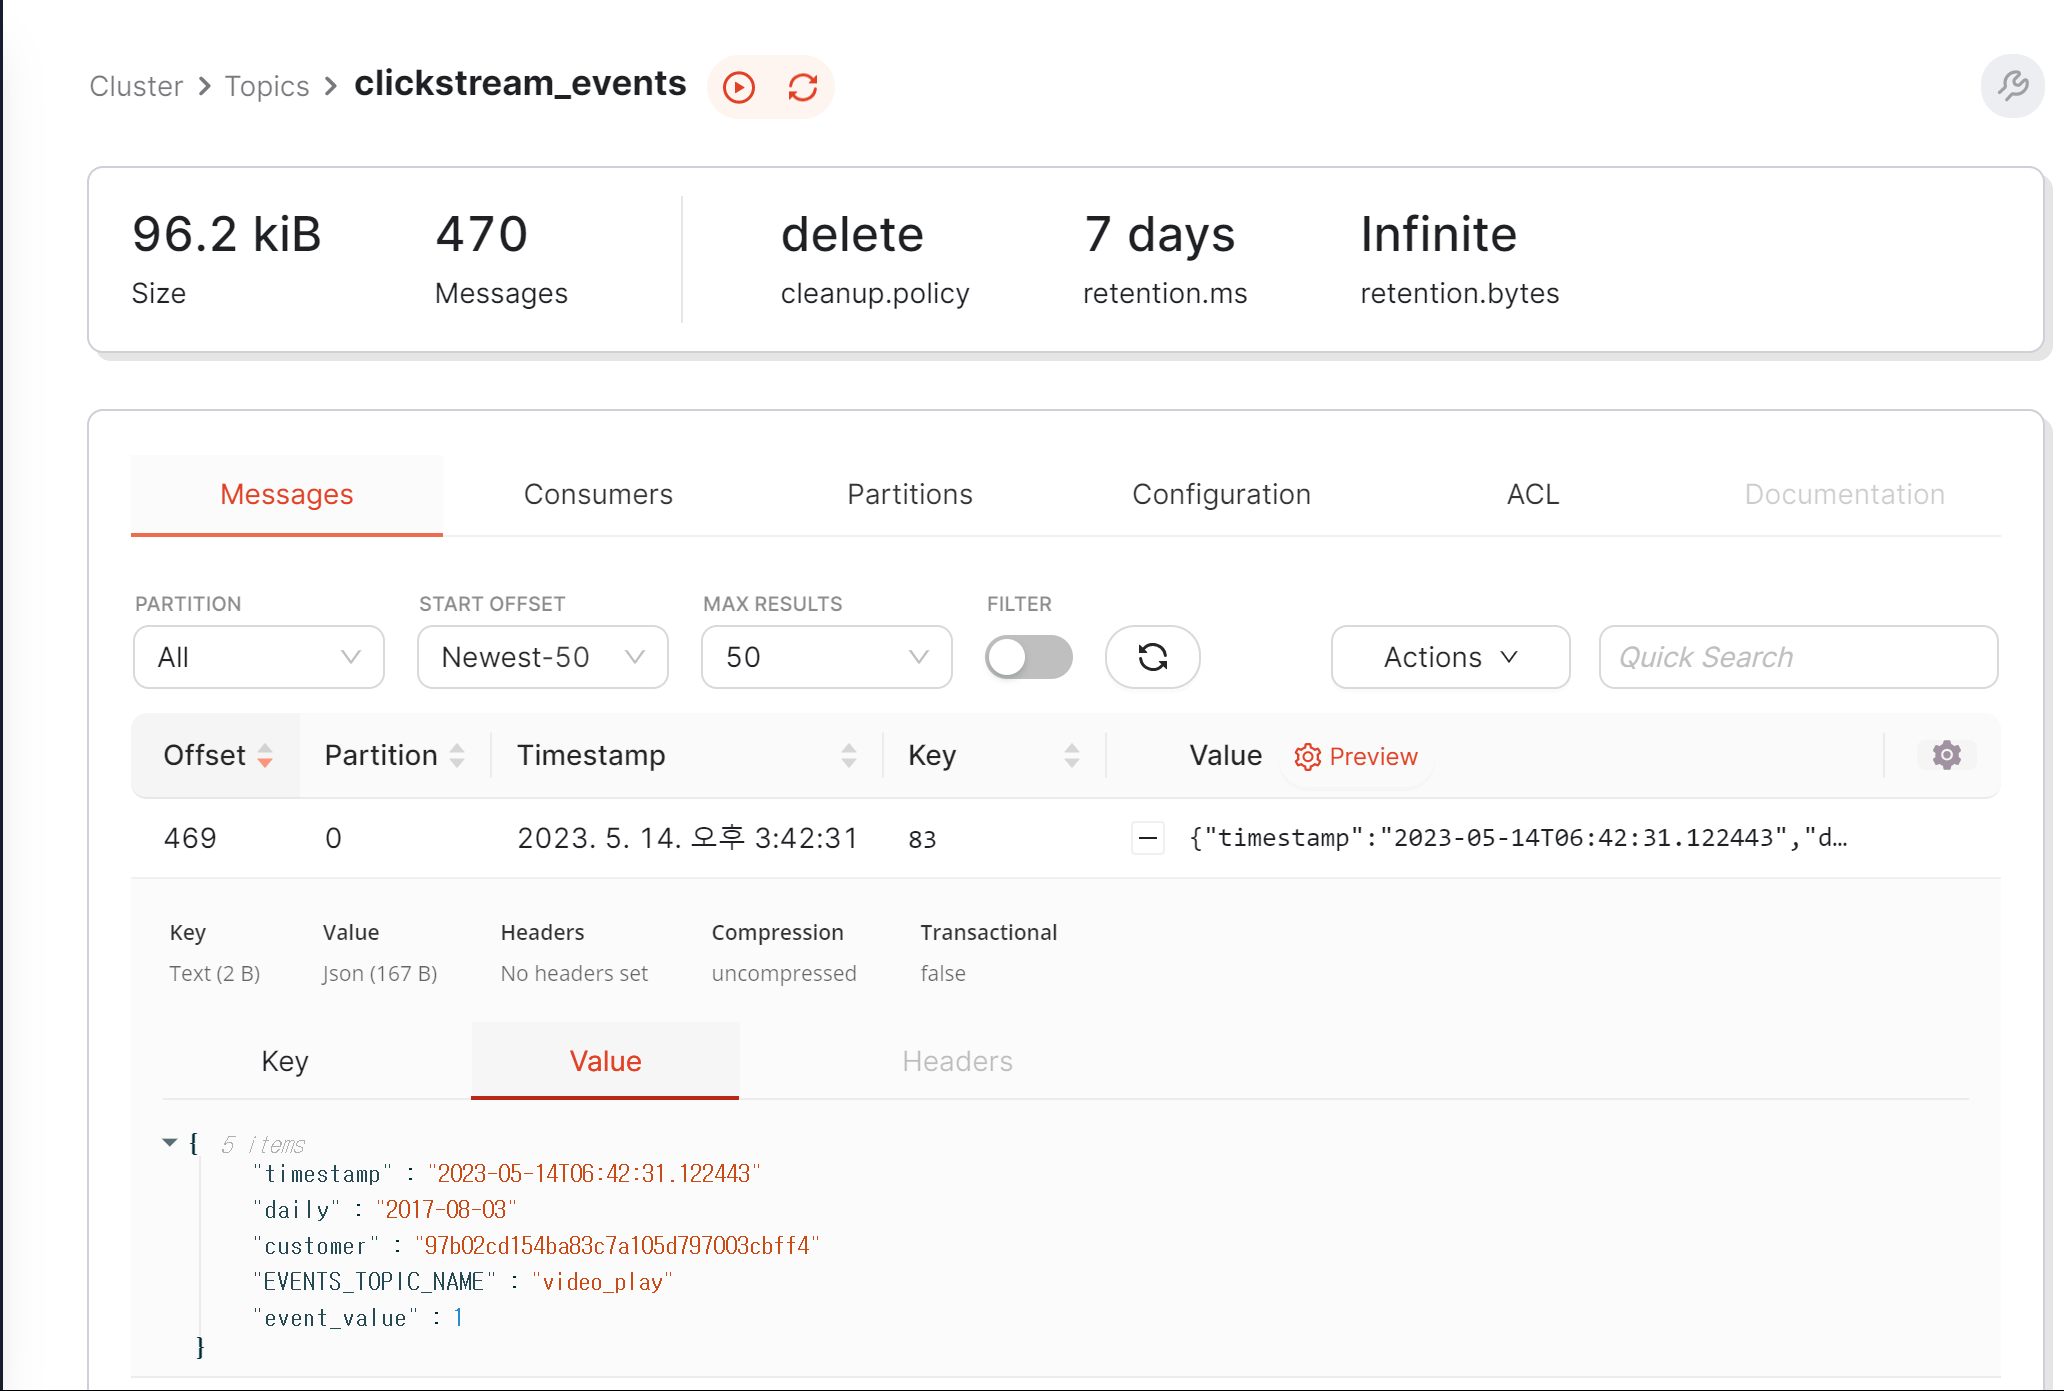
At this point, when checking with the Redpanda console, we will see that a topic has clickstream_events been created, along with events captured on the system.
Finally, to sink data about MinIO, register a connector on Kafka connect by requesting as below
1
2
3
4
5
6
7
8
9
10
11
12
13
14
15
16
17
18
19
20
21
22
23
24
curl --request POST \
	--url http://localhost:8083/connectors \
	--header 'Content-Type: application/json' \
	--data '{
	"name": "sink-s3-clickstream",
	"config": {
	"topics": "clickstream_events",
	"topics.dir": "clickstream_events",
	"connector.class": "io.confluent.connect.s3.S3SinkConnector",
	"key.converter.schemas.enable": "false",
	"key.converter": "org.apache.kafka.connect.json.JsonConverter",
	"value.converter": "org.apache.kafka.connect.json.JsonConverter",
	"value.converter.schemas.enable": "false",
	"s3.compression.type": "gzip",
	"format.class": "io.confluent.connect.s3.format.json.JsonFormat",
	"flush.size": "100",
	"store.url": "http://minio:9000",
	"storage.class": "io.confluent.connect.s3.storage.S3Storage",
	"s3.region": "us-east-1",
	"s3.bucket.name": "warehouse",
	"aws.access.key.id": "minio",
	"aws.secret.access.key": "minio123"
	}
}'
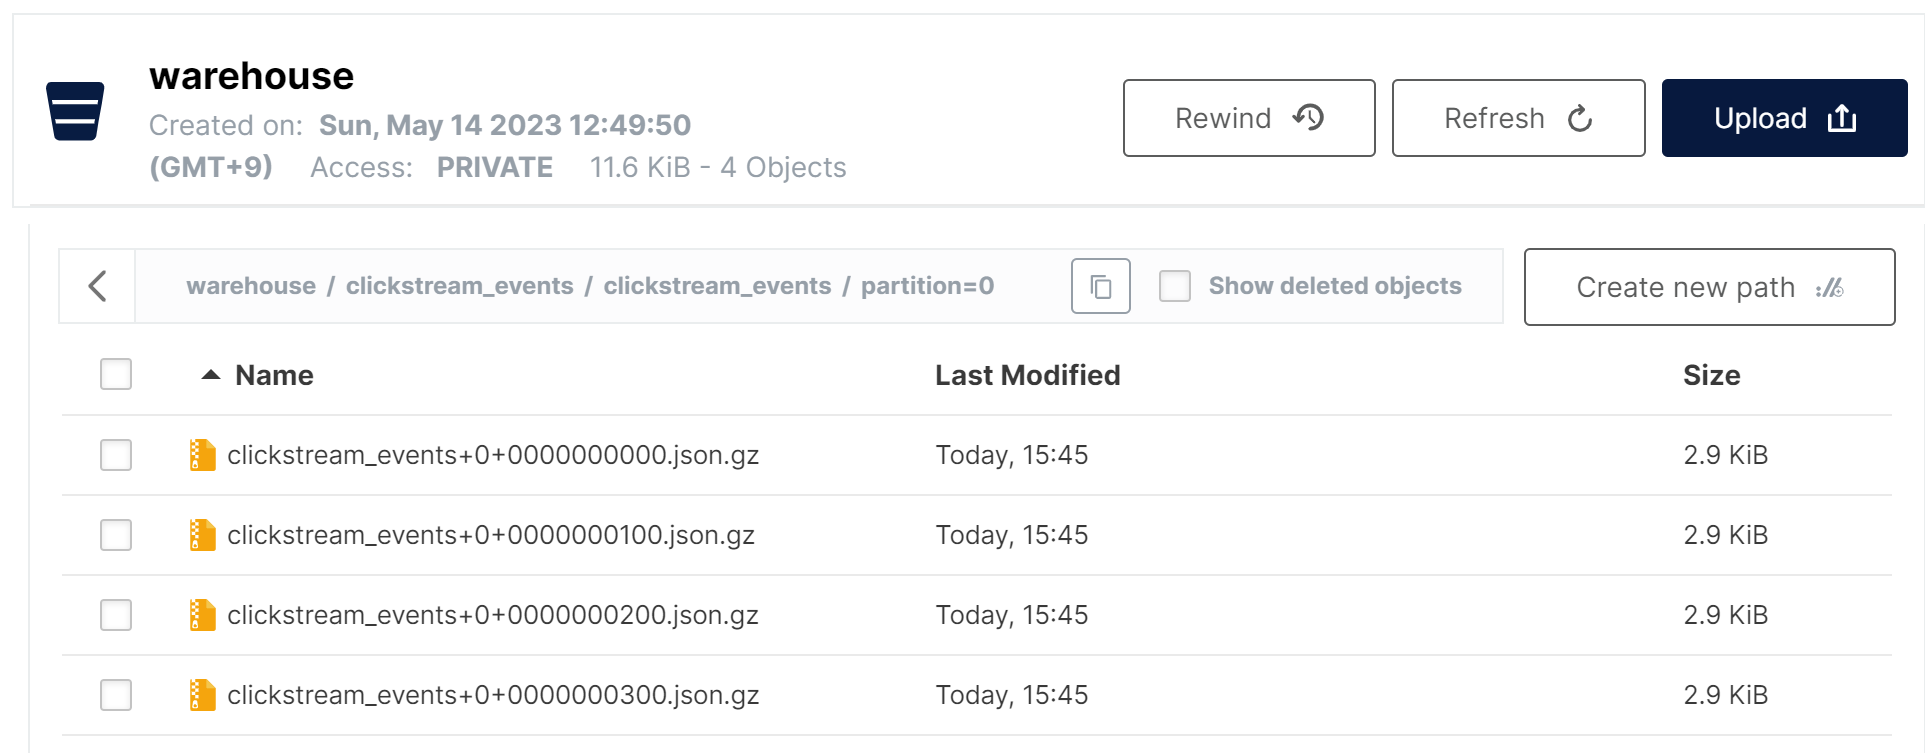
Yes, finally clickstream data has been synced to MinIO
결론
한 시스템에서 다른 시스템으로 데이터를 마이그레이션하는 것은 시간이 많이 걸리고 일괄 처리 수집 방향으로 이동하면 원래 시스템에 정체가 발생합니다. 새 데이터를 얻기 위해 데이터베이스에 대한 요청이 쇄도해야 하기 때문입니다. 실제로 1-2개의 테이블이 중요하지 않은 경우 보고서 분석을 수행하거나 기계 학습 모델을 제공할 수 있으려면 더 많은 테이블이 필요합니다.
스트림 데이터 수집은 CDC를 통해 추적된 변경 사항 덕분에 Steam에서만 로그 데이터를 읽기 때문에 소스 시스템의 부하를 줄이는 것과 같은 더 많은 이점이 있으며, 이 신뢰할 수 있는 소스에 전적으로 의존하여 다른 많은 시스템의 모든 데이터를 재현하고 재생성할 수 있습니다.
데이터 마이그레이션 프로세스는 Data Engineer의 모든 데이터 소비자에게 데이터를 제공하는 프로세스의 첫 번째 단계일 뿐입니다. 남은 작업은 사용자가 마지막에 전체 데이터를 볼 수 있도록 CDC에서 어떻게 재구성할 수 있는지입니다. 다음 기사에서는 이 CDC 데이터를 읽는 데 일반적으로 사용되는 두 가지 주요 알고리즘인 쓰기 시 복사 및 읽기 시 병합 .